If you’re attempting to install VirtualBox to take advantage of virtualization technology and use a virtual machine but encounter the ‘kernel driver not installed’ error, don’t worry. This is a common error on Apple’s macOS computers and requires you to add permissions and potentially disable Secure Boot, to resolve this error.
Continue reading if you’d like to learn more about VirtualBox, kernels, and how to fix the ‘kernel driver not installed (rc=-1908) error. This guide outlines three solutions with step-by-step instructions and follow-along images to help computer-savvy individuals and beginners alike.
What is VirtualBox?
Oracle’s VM VirtualBox, or just VirtualBox for short, is free and open-source virtualization software that works with x86 CPU architecture. It can be installed on Windows, macOS, Linux, and Solaris operating systems. VirtualBox can be used to create and manage virtual machines, running on operating systems like Windows, BSD, Linux, and others.
VirtualBox is often used to run applications that don’t work on the host operating system. It’s also useful for risky browsing and application development. The VirtualBox VM runs just like a physical OS yet remains isolated from the host OS.
What is a Kernel?
The kernel in computer speak is the first component of an operating system to load, acting as the central foundation for the rest of the OS. It provides important services for the rest of the operating system and is the primary layer combining hardware and OS architecture. The kernel helps manage networking, memory, and other file systems.
When VirtualBox starts a virtual machine, it uses the BIOS to run the bootloader. The bootloader is responsible for launching the kernel before the kernel takes over and finishes loading the operating system. If the kernel is damaged, it will be unable to load correctly, and the VM will not start. The kernel will also not load without proper permissions.
How to Install VirtualBox
To get started using VirtualBox software, you can follow the instructions outlined below:
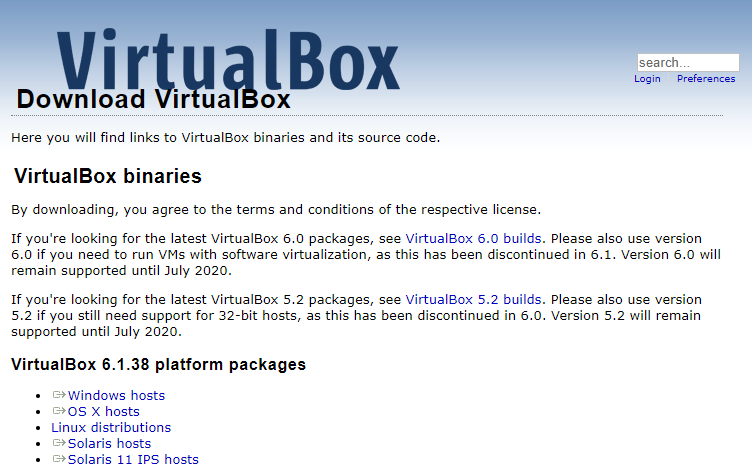
- Navigate to VirtualBox’s download page, and underneath VirtualBox 6.1.38 (number will change with subsequent versions) platform packages, click OS X hosts.
- A window will open where you can choose where to save the DMG file.

- Now navigate to this DMG file and double-click to open. A screen similar to the one below will appear:
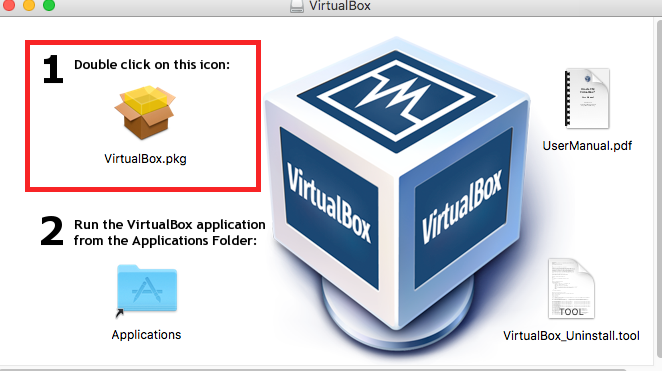
- Click the VirtualBox.pkg icon to open the installer. Then click Continue when prompted ‘This package will run a program to determine if the software can be installed.’
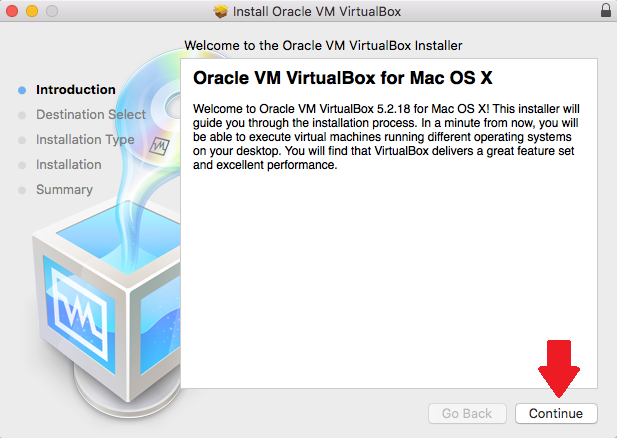
- When the Oracle VM VirtualBox Installer opens, click Continue.
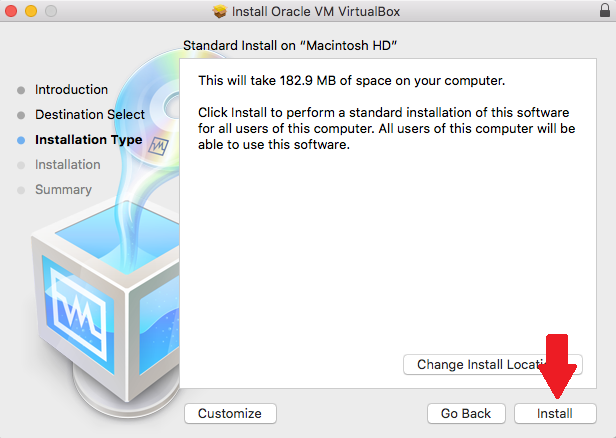
- You can change the install location for VirtualBox by selecting Change Install Location. You will also be notified of how much space VirtualBox will occupy on your computer. Click Install when you are ready to continue.
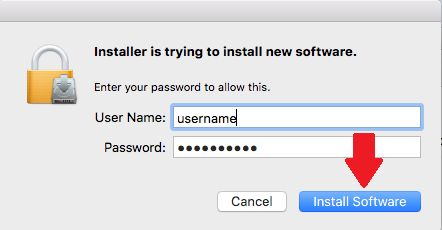
- Your computer will now prompt you to enter your Username and Password to verify you are the owner of the computer. Then click Install Software.
- Usually, when the installation of VirtualBox appears on macOS and the permissions are not correct or Secure Boot is interfering with the installation, you may see the following error:
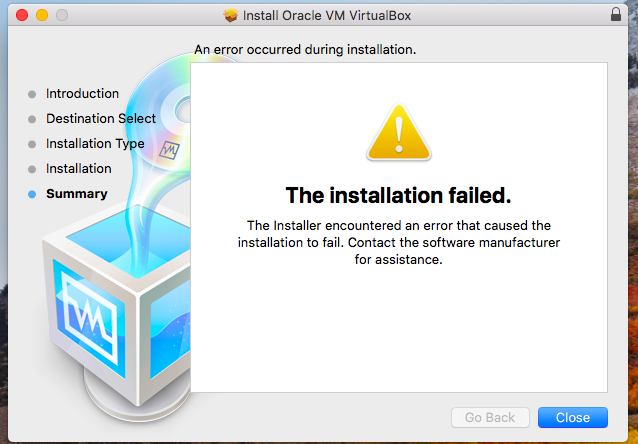
- At this time, you want to Close the installer and navigate to System Preferences. If you need help, please refer to the first solution in this guide to help you resolve the failed installation.
What Causes the Kernal Driver Not Installed Error?
The ‘Kernal Driver Not Installed’ error typically appears when a user first tries to set up a virtual machine using VirtualBox. The error is linked to the error code rc=-1908 and verr_vm_driver_not_installed, which warns the user to ‘Make sure the kernel module has been loaded successfully.’ The rest of the error can be seen in the image below:

This error most commonly appears in macOS systems because VirtualBox VMs need to be given explicit permission to load the kernel. Without this permission, this error is thrown, and the virtual machine cannot start. The error falsely hints that a kernel driver is to blame, but this is not the case.
Sometimes this error appears after upgrading your computer to the newest macOS update when VirtualBox had previously been working without issues. In that case, you will need to uninstall VirtualBox and start with a fresh install before following the first solution outlined in this guide.
3 Ways to Fix the Kernel Driver Not Installed Error
You will find three solutions below for fixing the ‘kernel driver not installed’ error on macOS. The first one is simple and easy enough for anyone to implement, although it may require uninstalling and reinstalling VirtualBox.
The second and third solutions, on the other hand, are more intensive and may be more difficult if you are not tech-savvy. But, you could follow along with the step-by-step instructions accompanied by images that we presented here.
1. Allow Permissions
macOS may block software to protect the operating system. This will result in a message in the System and Privacy settings. Unfortunately, this message times out after 30 minutes. If you’ve been trying to resolve this issue for an extended period of time, you need to uninstall VirtualBox first. You should also ensure that VirtualBox and all its associated files are completely removed.
Once this is complete, you can start with a fresh install of VirtualBox using the installer. To prevent the error within System and Privacy settings from disappearing again, you’ll need to follow the next steps within a 30-minute time period:
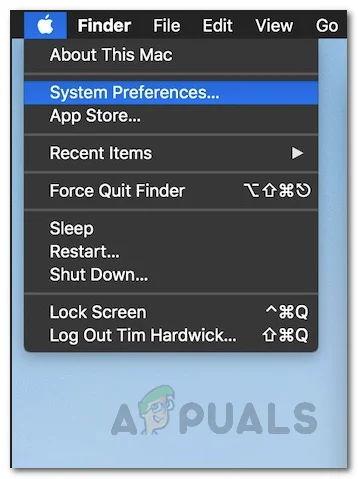
- Start by opening System Preferences by clicking on the Apple icon on the menu bar at the top-left of the screen. From the drop-down menu, select System Preferences.
- Within the System Preferences window, click on Security & Privacy. The icon looks like a house image.

- From the Security & Privacy window, select the General tab.

- Then look for a message at the bottom of the page that reads:
“System Software from developer ‘Oracle America, Inc.’ was blocked from Loading”
If this message is not there, then the 30-minute time period has already expired, and you’ll need to uninstall VirtualBox and remove all associated files completely. Then reinstall and navigate back to this window.
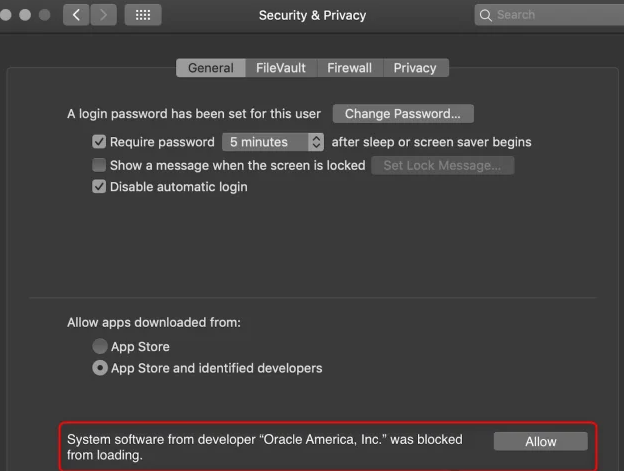
- If the message is visible, you can continue with this solution by clicking the Allow button.
- Now close the Security & Privacy window. Re-open VirtualBox and try to launch the virtual machine again to see if the error recurs.
2. Allow VirtualBox Extensions
The following solution does the same thing as above, but instead of using System Preferences, you will use the Terminal.
The macOS command-line interface, known as the Terminal, is comparable to Command Prompt for the Windows operating system. This solution is a little more complicated because it requires booting into Recovery Mode and using Terminal commands. But you can accomplish this process even if you are a beginner if you follow along closely with these instructions:
- To enter Recovery Mode, restart your computer and press Command + R immediately upon startup. Once the Apple logo appears, release Command + R.
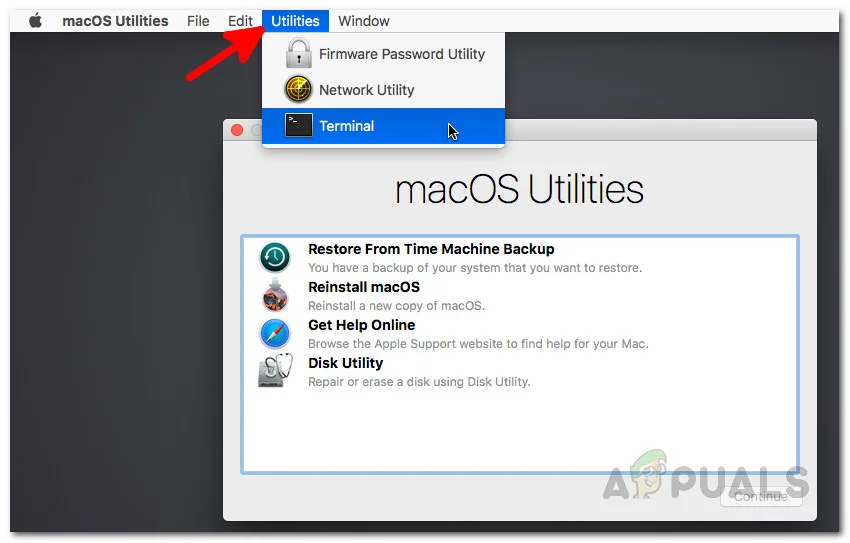
- Once loaded into Recovery Mode, you will see the macOS Utilities Window. Click Utilities located on the top menu bar.
- From the drop-down menu, choose Terminal.
- Within the Terminal window, type the following command and then press Enter:
spctl kext-consent add VB5E2TV963
- Once that command is complete, type the following command and press Enter to restart your computer:
sudo shutdown -r now
- Your computer will restart, and you can try to open VirtualBox again.
3. Disable Secure Boot
If the two solutions listed above don’t solve the “kernel driver not installed” error, you may need to disable Secure Boot.
Secure Boot is a security feature included with UEFI. It helps defend your macOS computer against any malware infections. Unfortunately, this security feature can sometimes be problematic, preventing perfectly safe software like VirtualBox from working correctly.
You will need to enter Recovery Mode again to disable Secure Boot. You can try disabling it to see if it resolves the ‘kernel driver not installed’ error by following these steps:
- To enter Recovery Mode, restart your computer and press Command + R immediately upon startup. Once the Apple logo appears, release Command + R.
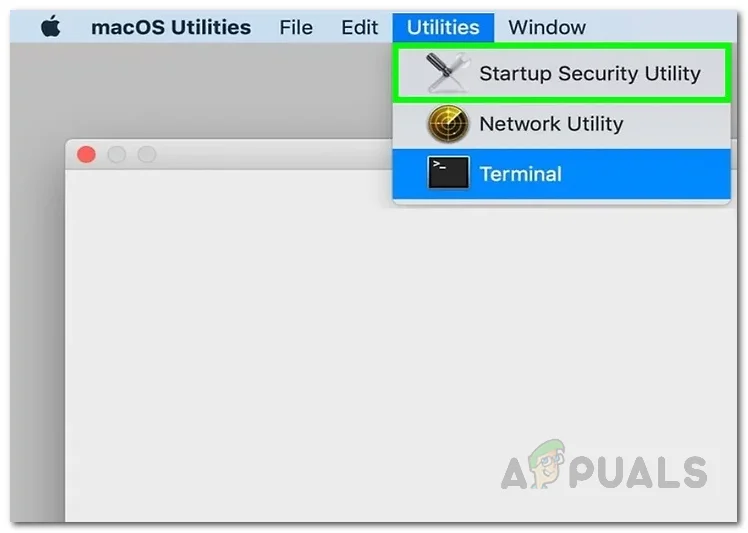
- Once loaded into Recovery Mode, you will see the macOS Utilities Window. Click Utilities located on the top menu bar.
- Select Startup Security Utility from the drop-down menu.
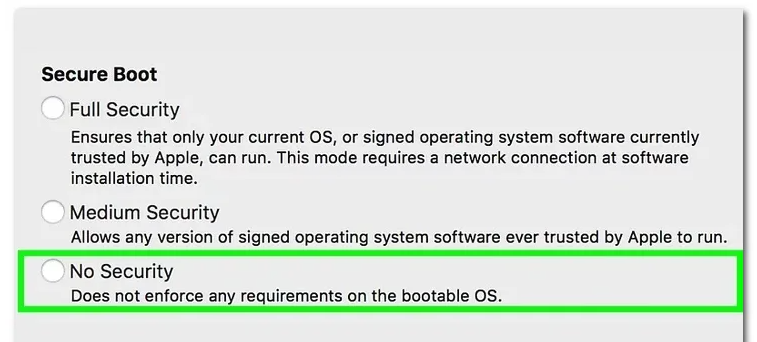
- A prompt will appear with the following options for Secure Boot: Full Security, Medium Security, and No Security. Select No Security.
- Now click the Apple Icon in the top-left-hand corner and choose Restart. Then start VirtualBox to see if the ‘kernel driver not installed’ error is resolved.

“Kernel Driver Not Installed” Error Fixed!
The ‘kernel not installed’ error usually affects macOS users trying to install VirtualBox to launch their first virtual machine. This error is triggered by a lack of innate permissions within macOS that needed to be added manually using System Preferences or the Terminal.
Although this error may also be attributed to interactions with secure boot, which you might need to disable. Usually, these three issues solve the permissions or other issues causing the ‘kernel driver not installed’ error in macOS.
Hopefully, VirtualBox is now working for you without any hitches!
Discover more from Jassweb
Subscribe to get the latest posts sent to your email.
