Your computer shuts down unexpectedly, and now the fans aren’t working. The next thing you know is that you have a CPU Fan error when the computer is rebooted. How are you going to fix this?
Continue reading this guide to know the importance of a CPU fan, what causes a CPU Fan error, and what this error is telling you. You will also learn 9 simple ways of fixing this problem.
What is a CPU?
The Central Processing Unit, or CPU, is the brain of your computer. The CPU handles all the computational tasks and data processing when you’re using your computer. Whether you’re working on a document or playing a game, the CPU is working behind the scenes to make it happen.
Taking a higher level look at the function of the Central Processing Unit:
- Fetches instructions from system memory, based on the next memory address provided by the program counter.
- Decodes into binary so the instructions are readable by the CPU (which understands Assembly).
- Executes the instructions and calculations, moving data to a different memory location, or jumping to a different address on the bus.
- Stores output after executing instructions in the memory.
Central Processing Units can only process one instruction at a time, but it does so at incredible speed. We won’t discuss clock rate or processor speed too much, but we have to mention that the faster a CPU, the more instructions it can execute in a smaller time frame. For example:
- 1 MHz can handle 1 million cycles per second. 1 MHz is highly outdated; this was the speed of computers in the 1970s.
- 1 GHz can handle 1 billion cycles per second, but again, this is now outdated too. This was the top speed of computers in the early 2000s. Today’s high-end computers fall between 3 and 5 GHz, but Intel is trying to surpass GHz clock speeds in their newest Raptor Lack processor series.
In the end, the important thing for you to understand is that CPUs are constantly working at remarkable speed to carry out all computational tasks for your computer.
The Role of CPU Fans
All those processing at breakneck speeds produces a ton of heat. If that heat accumulates around the CPU, it will damage the CPU and other critical hardware components.
That’s where the CPU fan comes in.
The CPU fan is mounted directly on top of the CPU to cool it using the thermodynamic principle of convection. As the fan turns, the heat radiating off the CPU dissipates and cooler air replaces the warm air. This cycle continues to keep the CPU within a safe operating temperature.
If your CPU fan is damaged, failing, or cannot adequately transfer heat away from the CPU, then your machine will quickly overheat. Windows BIOS/UEFI constantly monitors your CPU’s temperature behind the scenes.
Most Central Processing Units operate between 30 to 50 degrees Celsius (86 to 122 degrees Fahrenheit) without issues. But once a CPU starts hitting above 50 degrees Celsius for extended periods, expect damage to the hardware components. Your computer will automatically shut down to protect these components when temperatures reach a critical level.
What is a CPU Fan Error?
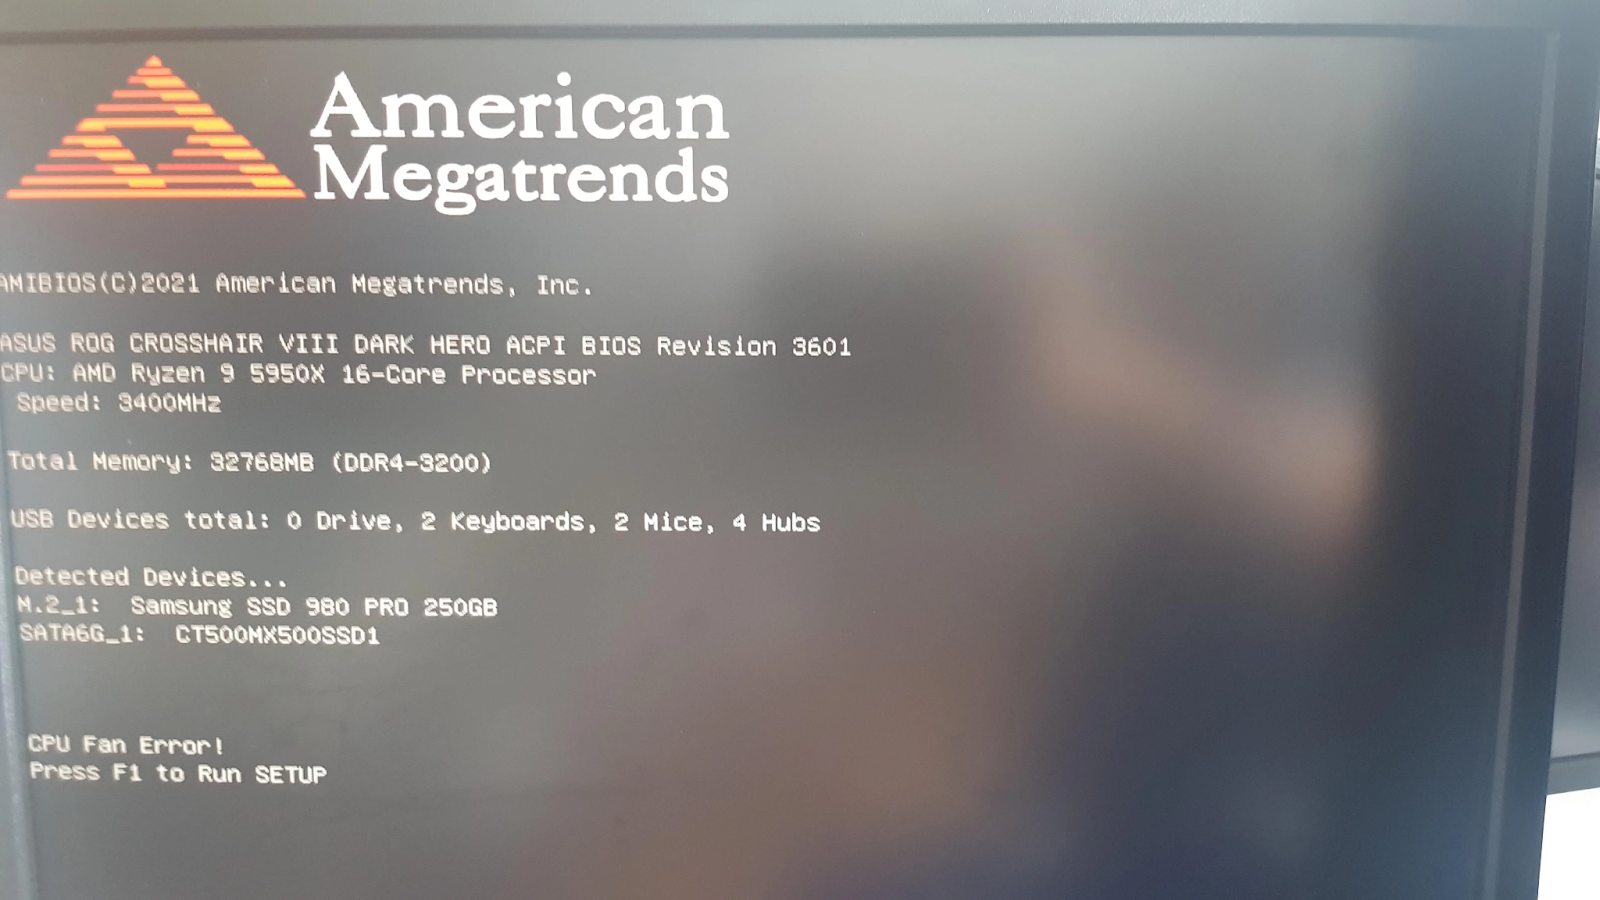
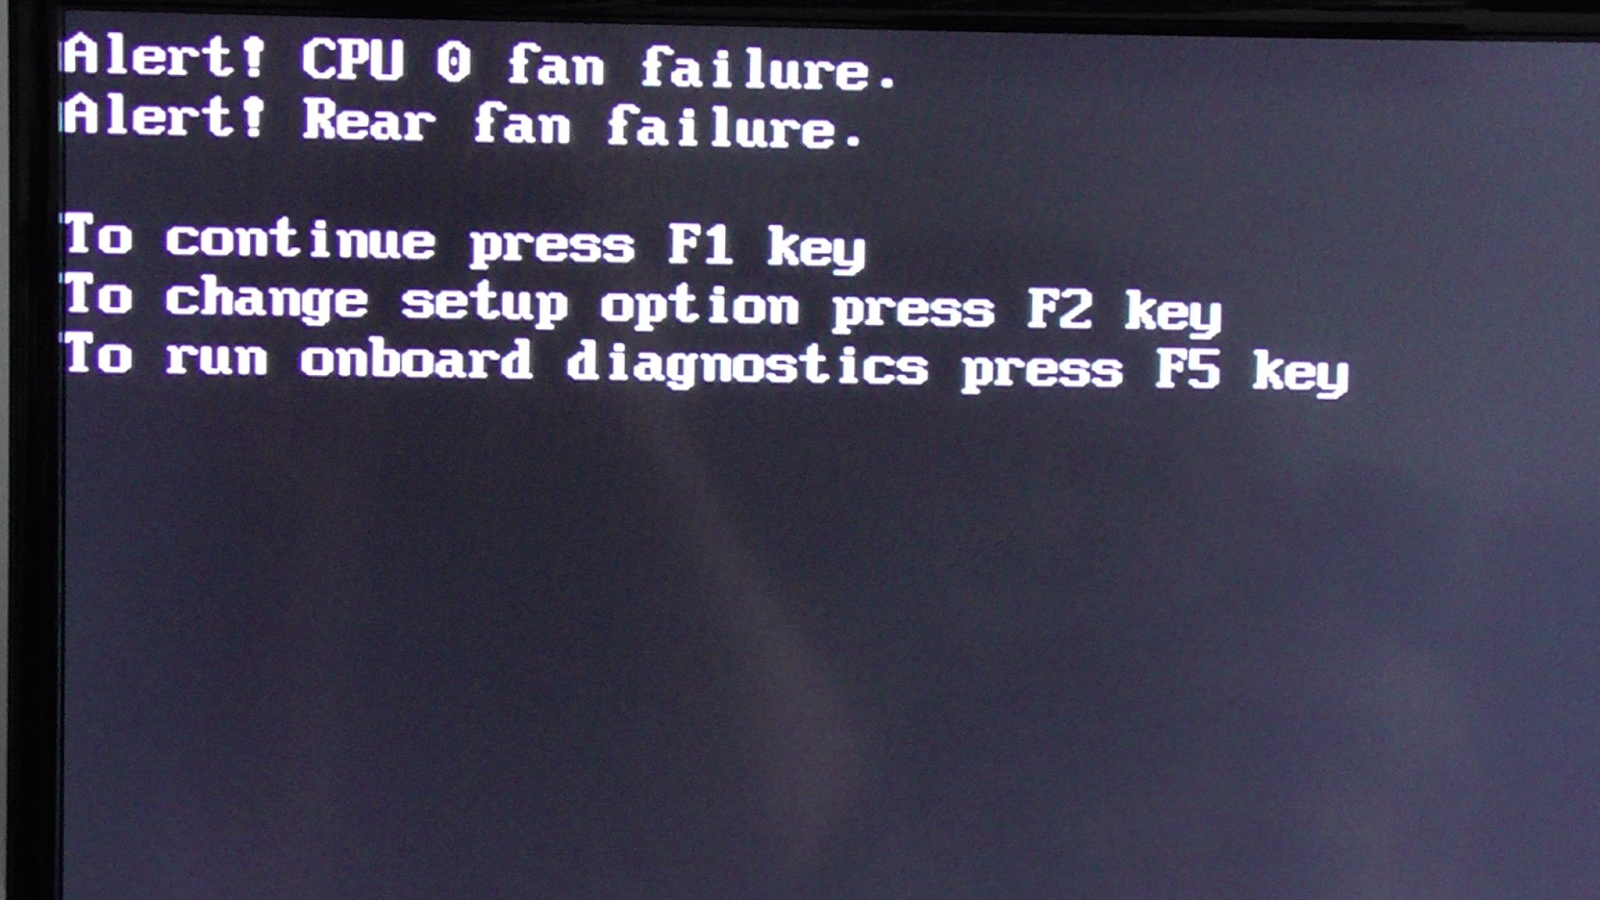
CPU Fan error does not appear during standard Windows operation. It only appears after a self-induced shutdown when Windows tries to protect its hardware components. As Windows boots back up, you may see one of these error message variations, depending on your computer brand:
- CPU Fan Error
- Asus – Error: CPU Fan Has Failed!
- MSI – CPU fan error, Please check!
- HP – Alert! CPU fan failure. OR System Fan (90B)
- American Megatrends – CPU fan speed error detected
- Lenovo – Error 0135
- Dell – Processor fan is not responding
Essentially, this error tells you that your CPU fan is failing, damaged, or some other factor prevents the fan from cooling down your CPU as intended. Here are some examples of the error as it might appear on your computer:
What Causes the CPU Fan Error?
Multiple issues can cause an emergency shutdown and CPU Fan error on startup. Consider how old and well-maintained your computer is because older systems or poorly maintained ones can have various issues contributing to the CPU Fan error:
- Dust Buildup – over time, dust accumulates on the blades of your CPU fan. Dust buildup prevents efficient airflow during operation and limits the cooling capacity of the CPU fan. A significant dust buildup might cause the CPU to overheat and shut down the computer.
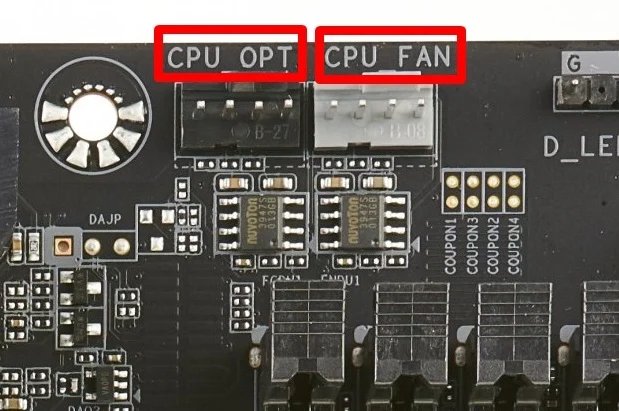
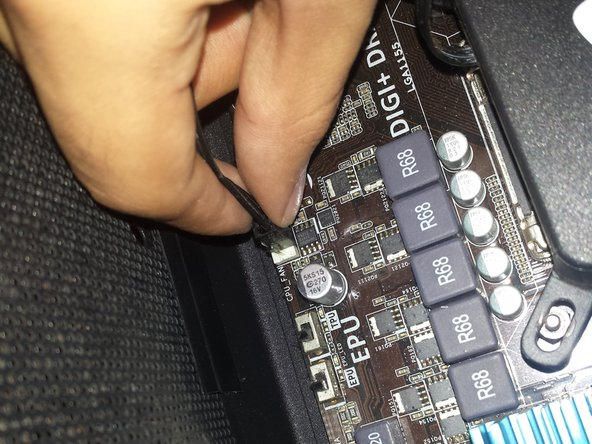
- CPU Fan Not Plugged In Properly – if you’ve recently made any changes to your computer, it’s possible that you improperly installed the CPU fan or dislodged the fan connection. The CPU fan must be installed correctly to the CPU_FAN header using the 4-pin connector.
- Low CPU Fan RPM – This is an issue commonly experienced on Asus devices. Q-Fan Control is an Asus feature that sometimes throws a false CPU fan error. If the CPU fan is operating at low RPMs when the CPU temperature is low, the motherboard might not correctly detect that the CPU is working.
- BIOS Not Updated – if the BIOS uses outdated firmware, it might not recognize your CPU fan correctly. Update the BIOS to fix this problem.
- Physical Damage to Fan – check if your CPU is damaged. It may be caused by normal wear-and-tear or perhaps by accidental bumps that broke off pins when you tinker inside the case. These issues can cause the fan not to dissipate heat effectively and lead to the CPU Fan error.
- Incorrect Fan Settings – Your motherboard controls the CPU fan based on settings from the BIOS. If these BIOS settings aren’t correct, your fan may not work properly to keep the CPU cool.
9 Ways to Troubleshoot the CPU Fan Error
1. Stop Overclocking
If you overclocked your computer, thus increasing the clock rate past the manufacturer’s recommendations, you might see a CPU fan Error. This is a warning that if you keep your computer in an overclocked state, you may irreparably harm the components.
2. Clean CPU Fan & Air Vents
One of the most common causes of CPU Fan errors is a dirty CPU fan. You should regularly clean your CPU fan (and other fans and dust filters). Every three to four months should be adequate.
To clean a CPU fan, you’ll want to follow these basic steps:
- Turn off your computer and unplug it entirely from any power source.
- Remove the side panel and set it safely aside. Ensure the fans have completely stopped spinning before putting your hands inside the computer.
- Use a can of compressed air to clean the fan intakes and all fin surfaces. Use short puffs of air.
- Clean the air vents by removing accumulated dust that prevents fresh airflow into the computer.
- Once your fan is clean, reinstall the side panel and restart your computer to see if the fan error resolves.
This method for cleaning the CPU fan is simple and does not require removing the CPU fan. Later we’ll cover exactly how to remove the CPU fan, so you can completely clean it.
3. Check For Damage
When you have the computer open to clean the fans, take a flashlight and check for any damage. Check the fins, ensure that the fan does not wiggle or shake, that it can spin freely and that the CPU fan cable is not damaged.
4. Check that CPU Is Installed Correctly
If you recently worked on your computer, you may have unplugged the CPU fan for easy access to components and not plugged it back in correctly or at all.
With your computer completely unplugged and the side panel removed, check that the CPU fan is installed in the correct header. Your CPU fan should be connected to the 4-pin CPU_FAN header. Check that it’s seated all the way.
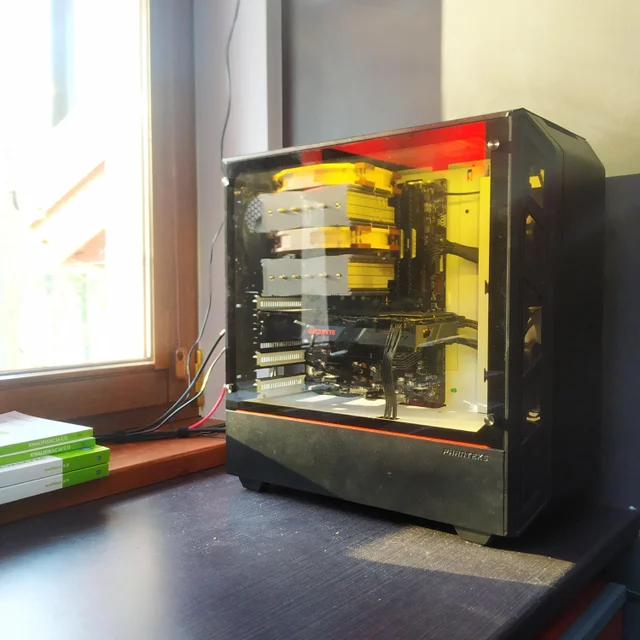
5. Move the Computer
Ask yourself if your computer is in a good location. Computers produce tremendous heat and should be kept in a well-ventilated cool room. Avoid putting your computer in a warm room or directly exposed to sunlight because your fan won’t be able to keep up.
Also, ensure there is adequate airflow around your computer. Don’t store it in enclosed spaces or behind furniture and other obstacles. You may think you’re keeping it out of harm’s way, but you’re asking for premature breakdown. Generally, you want at least three sides open to airflow.
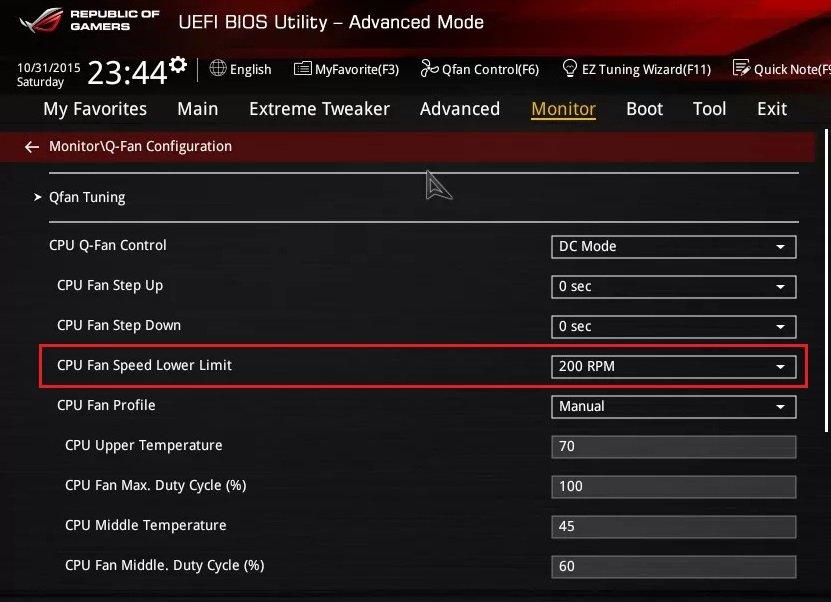
6. Reduce CPU Fan Speed Low Limit Option in BIOS
We mentioned an Asus-specific issue about low CPU fan speeds in the earlier section (Causes for CPU Fan Error). If you have an Asus motherboard, consider checking that your CPU fan speed can’t go too low. This prevents the motherboard from recognizing that the CPU is in fact, working correctly:
- To enter the BIOS/UEFI on an Asus machine, press the Delete key as soon as the Asus logo appears during startup.
- Navigate to the Monitor tab, and then find Q-Fan Configuration.
- Under the Qfan Tuning option, find the setting for CPU Fan Speed Lower Limit.
- Now you want to raise this limit to at least 200 RPM or set it to Ignore.
- Exit the BIOS by navigating to the Exit tab and allowing your computer to restart.
- Your fan will now always run at 200 RPM even if your CPU runs very cool and doesn’t need that level of cooling. This ensures the Asus motherboard always recognizes the fan.
If you don’t have an Asus-specific motherboard, you can still double-check the BIOS for any similar lower limit to your fan speed.
7. BIOS Not Updated
This is another Asus-specific solution, but it would also be good to check on any device to rule out the possibility that this is a contributing factor. If the BIOS has not been updated, your BIOS might not recognize that the CPU fan is installed and working correctly.
BIOS updating depends on the manufacturer, but usually, you can update using EZ Flash Update or an internet connection. This is a specialized solution, so we’re not going to cover it at length here. If you need help updating your BIOS for an Asus motherboard, check out this resource.
8. Wrong BIOS Settings
There are multiple fan settings that the BIOS controls. You can open up the BIOS and quickly check if the settings are correct and change them if they are not. Before you do it, check how to enter BIOS for your specific manufacturer. For example, if you have a Lenovo machine, search how to enter BIOS for that machine correctly.
- Restart your computer. During boot, look for the BIOS access message and press the specific key for your manufacturer to enter BIOS.
- Once inside BIOS/UEFI, find the Advanced Settings tab. The layout is going to differ between manufacturers.
- Within the Advanced Settings, locate Hardware Monitor and then CPU Fan. Now you should see all the CPU fan settings available for your computer.
- Check that these two settings are enabled:
Active Heat Sink
Fan Duct with Fan
- Make sure you save the settings before exiting BIOS. Restart your system and check if the CPU Fan error on boot is resolved.
9. How to Replace a CPU Fan
Sometimes your CPU fan completely fails and needs to be replaced. You might diagnose failure if you see the CPU fan is not spinning at all. To replace the CPU fan:
- Power off your computer and unplug from any power source. Remove the side panel. Clean your hands and use an anti-static wrist strap to ensure you are grounded and will not damage any functioning components.
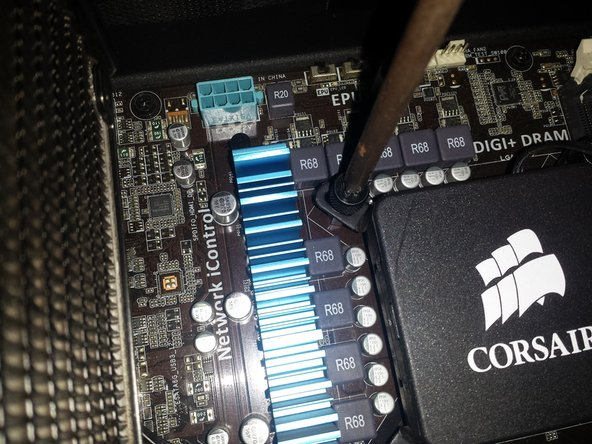
- Unplug the CPU fan connector cable from the 4-pin CPU_FAN header.
- Locate the CPU fan, which is usually sitting directly on top of the CPU. Remove the screws or pop any connector pins off to allow the CPU fan to come loose. Refer to motherboard manufacturer manuals if you need help disconnecting the CPU without damaging components.
- Once the fan is removed, set it aside. Using isopropyl alcohol on a microfiber towel, carefully clean the thermal paste residue from the CPU.
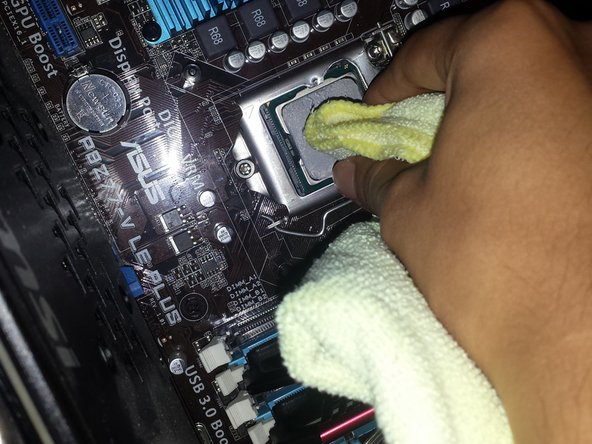
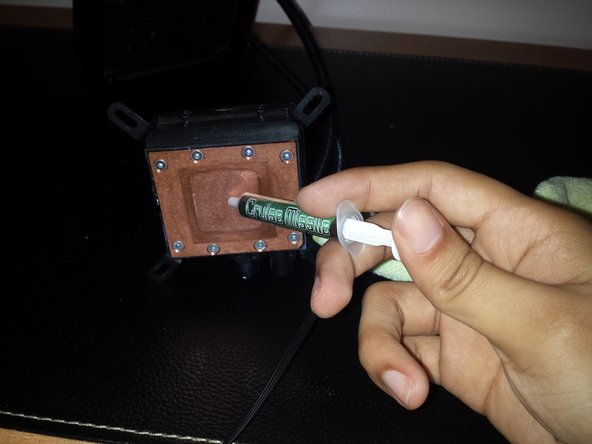
- Check if your new CPU cooler comes with thermal paste. When the CPU is completely dry, apply a small amount of thermal paste to the very center of the CPU.
- Install the new CPU fan over top of the CPU, aligning it with all four corners. Secure the cooler using an X-shape pattern, meaning start in one corner and move to the corner diagonally opposite. Screw the cooler in but don’t over-tighten, or you risk damaging the motherboard.
- Plug in the new CPU fan to the 4-pin CPU_FAN header.
- Reinstall the side panel, plug in the computer, and power it on. Listen closely to check if the CPU fan is working. You should immediately shut the computer off to troubleshoot if it’s not.
Solved! CPU Fan Error Fixed!
You should never ignore a CPU Fan error. After an initial CPU Fan error, your machine may continue to run for a while but will probably overheat and force a shutdown again.
Usually, the CPU Fan error is associated with dust buildup, but it can also be due to an outdated BIOS, poor computer location or ventilation, incorrect fan settings, low fan RPM, fan damage, improper fan installation, or CPU fan failure. We’ve covered each of these causes within this article.
We hope your computer has recovered from the CPU Fan error and your CPU fan is now cooling as intended!
Discover more from Jassweb
Subscribe to get the latest posts sent to your email.
