Microsoft’s DirectX is a set of tools for enhancing multimedia performance in a Windows PC. The programs that are improved by DirectX are games, video playbacks, sound, and graphics. DirectX is indeed a valuable tool for Windows users. However, such an amazing tool is also prone to some errors. If DirectX on your computer becomes corrupt, it can cause problems for some users. If you are one of those struggling users, then you might want to try to reinstall DirectX Windows 10. Sometimes, troubleshooting the GPU, hardware, and software of your PC is not enough in resolving issues with DirectX. One potential fix in such a case is to re-install or clean install Microsoft DirectX 12 for Windows 10, which is possible with our thorough guide. Learn more about DirectX and how to reinstall it in the upcoming sections.
How to Re-Install DirectX in Windows 10?
Even though DirectX is an in-built application in Windows 10 and it updates automatically with the system update, it is possible that your system continues to run on older versions of DirectX. This can happen due to certain programs that interfere with the reinstall DirectX 11 process. Also, issues during the upgrading process can also lead to DirectX becoming corrupt. As there are no standalone packages for downloading DirectX, follow the given steps that can help you with reinstalling it on your Windows PC.
Easiest Method: Check for & Install Windows Update
Usually, an update for Windows is installed automatically on a PC or a laptop. In case it does not happen, you can check for Windows update manually and install it. Because in Windows 10 and above versions, updating the operating system helps in refreshing DirectX too. This will help you with the same experience as to reinstall DirectX 11. You can check our guide on How to Download and Install Windows 10 Latest Update for more.
Also Read: How to use the DirectX Diagnostic Tool in Windows 10
Step I: Uninstall DirectX
The first thing that needs to be done is the uninstallation of DirectX from your PC. Uninstalling all the files of DirectX is the only way to install Microsoft DirectX for Windows 10 later. There are many ways to achieve this such as:
- uninstalling the program from the Control Panel,
- removing DirectX with its uninstaller.exe.,
- using system restore to remove DirectX, and many more.
Explained below is the simplest method for uninstalling DirectX using the Programs and Features option on your PC. So, let us begin with the steps so you can further reinstall DirectX Windows 10:
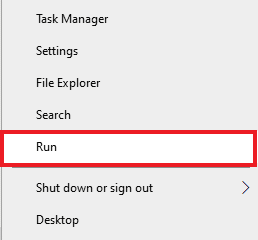
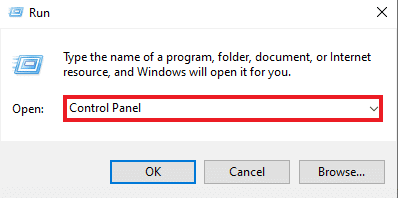
1. Right-click on the Start icon on your Desktop and choose Run as shown.
2. Enter Control Panel in Run dialog box & press Enter.
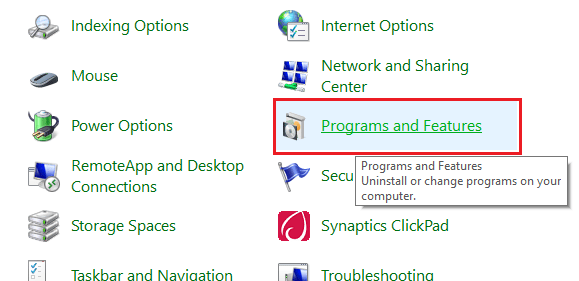
3. Now, select Programs and Features.
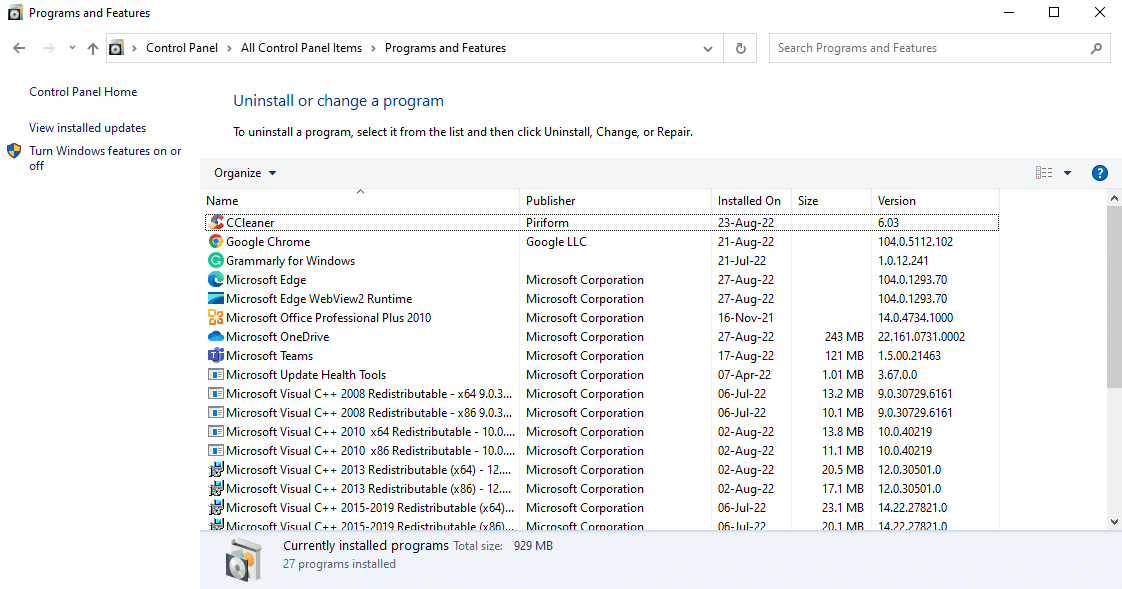
4. Next, look for DirectX in the list of programs and right-click on it.
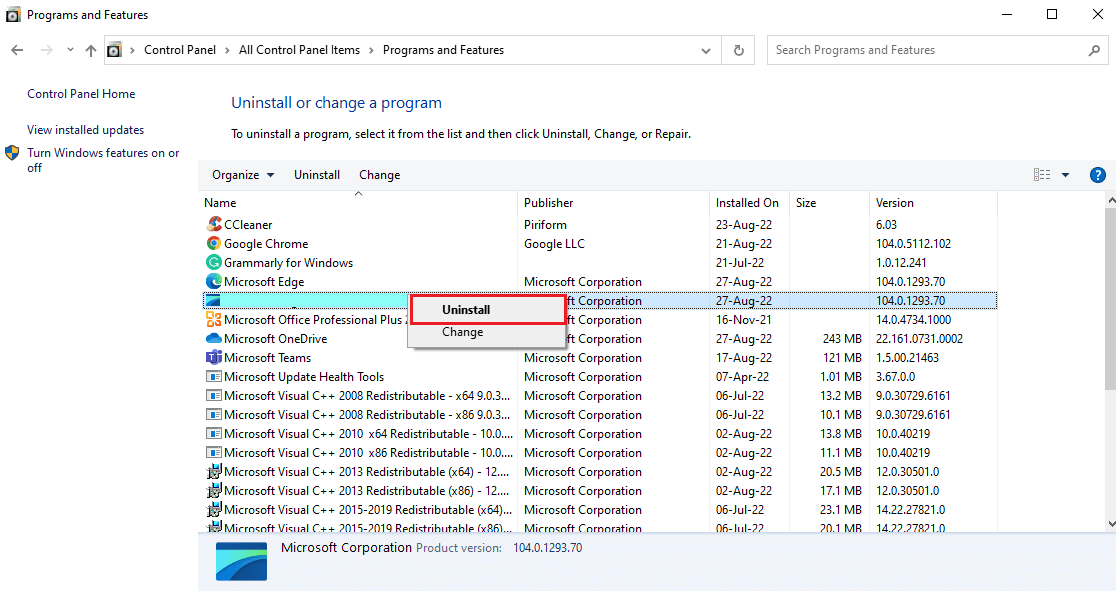
5. Select Uninstall from the given menu as shown.
6. Confirm the same & follow on-screen instructions, as prompted.
Also Read: Fix Alps SetMouseMonitor Error in Windows 10
Step II: Download DirectX Installer
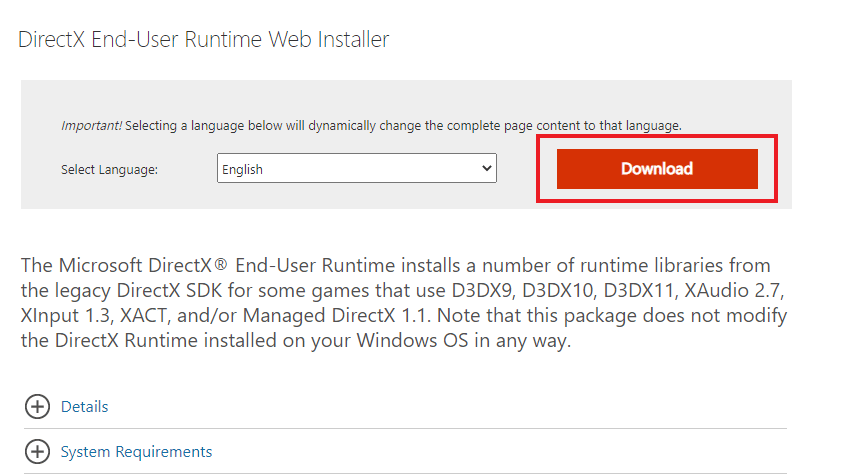
The next method that is extremely helpful to reinstall DirectX Windows 10 is to manually download the DirectX installer which is available in the Microsoft Download Centre. This method helps in restoring missing files, if any, and processing reinstallation of DirectX. Now, follow the steps given below to use the DirectX installer:
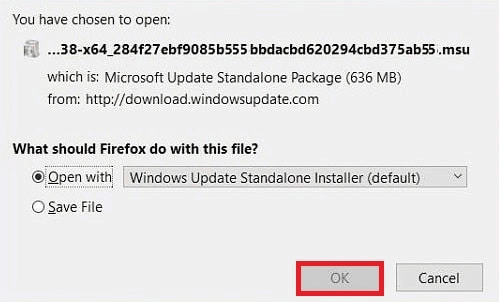
1. Open any web browser to download DirectX End-User Runtime Web Installer.
2. Once you have selected the language, click on Download.
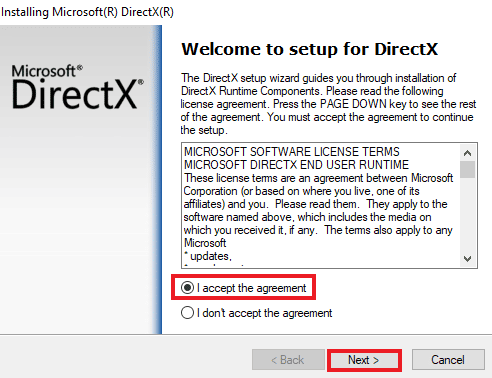
3. Click on the dxwebsetup.exe file downloaded on your PC.

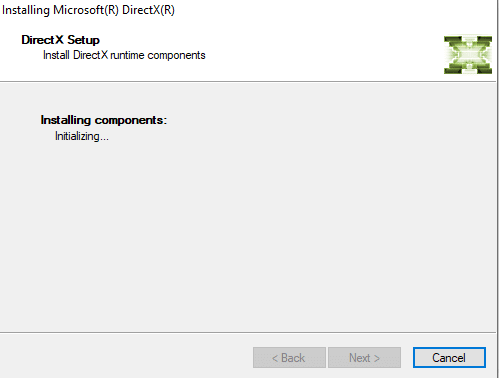
4. Select I accept the agreement and click on Next in the Installing Microsoft(R) DirectX(R) window.
5. Now, click on Next again.
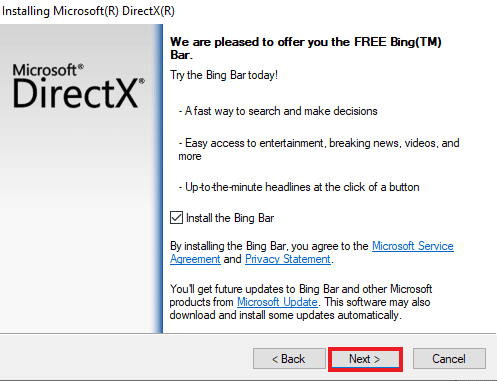
6. The DirectX Setup will start to install as shown.
Also Read: How to Update DirectX in Windows 10
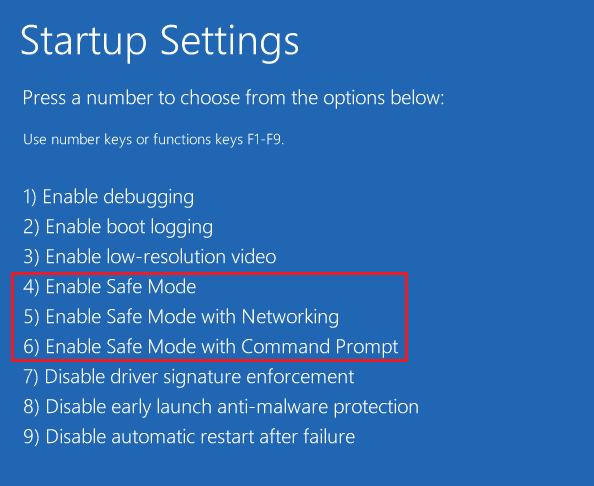
Additional Method: Install DirectX in Safe Mode
Another way to DirectX 12 update is to force your PC to update DirectX indirectly. You can try running your PC in safe mode to do it. Safe mode in PC helps in dealing with issues of the operating system and also processes any pending updates.
In case you are having trouble installing the DirectX update, follow our guide How to Boot to Safe Mode in Windows 10.
Then, follow our guide on How to Download and Install Windows 10 Latest Update for DirectX 11 or DirectX 12 installation.
Frequently Asked Questions (FAQs)
Q1. How can I install DirectX on my PC?
Ans. DirectX comes pre-installed for the latest versions of Windows. You can still install DirectX from the official Microsoft website where you can use DirectX End-User Runtime Web Installer for download.
Q2. Can I uninstall DirectX 12 and reinstall DirectX 11?
Ans. If you already have DirectX 12 on your PC, you cannot reinstall DirectX 11 without editing the registry and tricking the system into it.
Q3. How can I repair DirectX?
Ans. You can repair DirectX by reinstalling or updating it on a Windows PC.
Q4. How can I install the missing DirectX?
Ans. You can install the missing DirectX by running dxsetup.exe to install DirectX properly and then reinstall DLL files.
Q5. Why is DirectX not working on my PC?
Ans. If DirectX is not working on your PC, it can be due to the outdated version of DirectX installed.
Recommended:
Since DirectX comes pre-installed on Windows latest versions, you don’t have to worry about installing it manually. But as issues with DirectX are sometimes inevitable, you can reinstall Microsoft DirectX for Windows 10 using our helpful guide. Let us know about your suggestions or any queries if you have regarding the topic by leaving them in the comments section below.
